
The user experience (UX) design process isn’t some mystical art form reserved for Silicon Valley giants with massive design teams. Forget that. It’s a practical, repeatable system for creating products that people actually find useful, easy to navigate, and even enjoyable.
Think of it less like painting a masterpiece and more like following a proven recipe. It’s a methodical way to understand who your users are, pinpoint their real problems, brainstorm solutions, and test them out before you sink a single penny into development.
What Is The User Experience Design Process, Really?
For a bootstrapped SaaS founder, treating the UX design process like a rigid corporate checklist is a huge mistake. Instead, see it for what it truly is: your secret weapon. It’s a lean, flexible system that helps you focus your limited time and money on building features that solve genuine customer pains—the kind that drive real growth.
Ultimately, it’s a powerful shield against the number one startup killer: building something nobody wants. To get this right, you first have to understand what is user experience design at its core before you start applying the methods. It’s all about creating a continuous loop of learning and iteration to stack the odds of success in your favour.
The Double Diamond: A Simple Map For Your Journey
One of the best ways to visualise this journey is the Double Diamond model. It’s a simple but brilliant map that breaks the entire process down into four clear stages, guiding you from a fuzzy idea to a validated, market-ready solution.
The model is built around two key phases: first, figuring out the right problem to solve, and second, figuring out the right way to solve it.
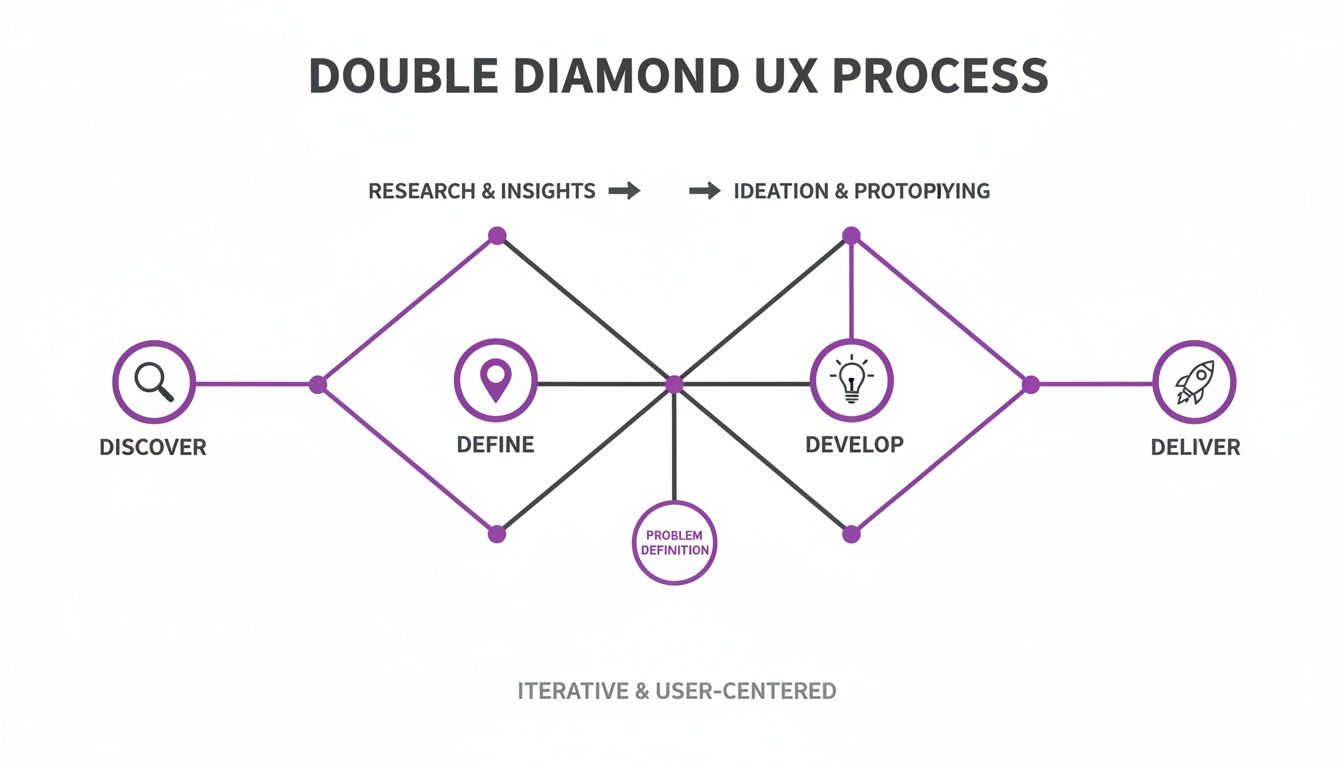
The real genius of this model is its “diverge and converge” pattern. You start wide to explore all possibilities (diverge), then narrow down to a single, focused point (converge). You do this twice—once for the problem and once for the solution. This stops you from jumping the gun and building the first thing that pops into your head.
Here’s a quick look at how these stages apply directly to a founder’s workflow.
The Four Core Stages of the UX Design Process
A quick summary of the Double Diamond framework, adapted for a SaaS context.
| Stage | Core Question | Primary Goal for Founders |
|---|---|---|
| Discover | What’s the real problem here? | Talk to users and uncover their actual pain points, not just the ones you assume they have. |
| Define | What challenge will we focus on solving? | Pinpoint a single, clear problem statement that the entire team can rally behind. |
| Develop | How might we solve this challenge? | Brainstorm multiple solutions, sketch them out, and create simple prototypes to explore ideas. |
| Deliver | Does our solution actually work for users? | Test your prototypes with real people, gather feedback, iterate, and refine until it’s ready for launch. |
This structured approach transforms product development from a high-stakes gamble into a calculated, repeatable strategy.
The goal of a designer is to listen, observe, understand, sympathise, empathise, synthesise, and glean insights that enable him or her to ‘make the invisible visible.’ – Hillman Curtis
When you embrace this way of thinking, you ensure every feature you build is anchored in a real user need. This is the heart of user-centered design, and it’s not just about making things look pretty. It’s about building a sustainable business that customers genuinely love and are happy to pay for.
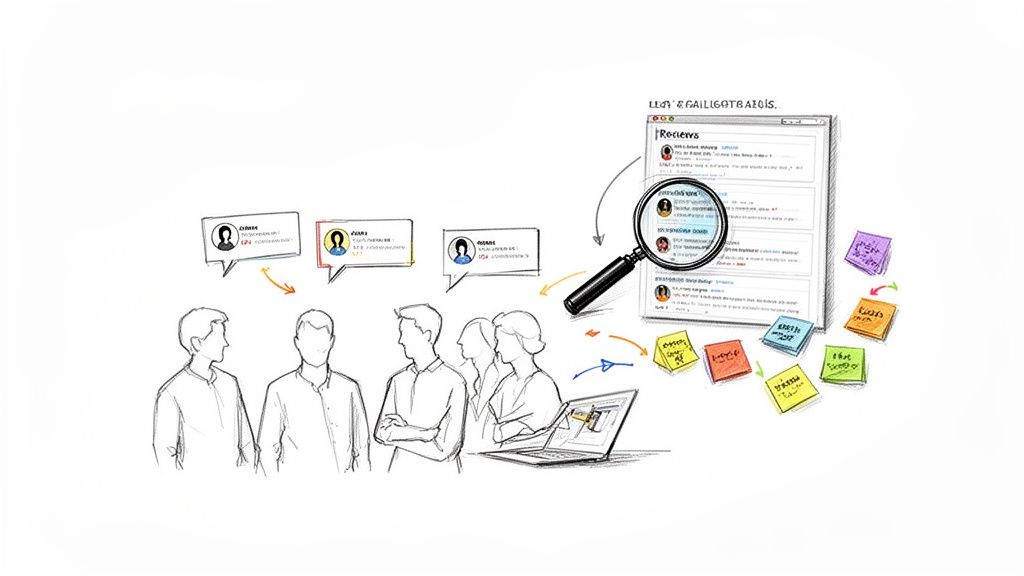
Stage 1: Discovering What Your Users Truly Need
The whole user experience design process starts with one simple, non-negotiable ingredient: empathy. Before you can even think about building a solution, you have to get inside your user’s head and understand their world. This first discovery stage is all about ditching your founder assumptions and getting genuinely curious about your customers’ reality.
Too many bootstrapped teams sprint past this step, worried they don’t have the time or cash for “proper” research. That’s a huge mistake. You don’t need a team of researchers in white lab coats; you just need to be curious and have a basic plan. The aim here isn’t to collect mountains of data, but to find those rich, qualitative nuggets that tell you the real story behind what users do.
Think of this early exploration as an insurance policy against building something nobody wants. When you start with real discovery, you’re not just taking a wild guess—you’re letting them tell you exactly what to build.
Lightweight Research for Lean Teams
Good user research doesn’t have to break the bank. For a small SaaS team, the trick is to focus on scrappy, high-impact methods that deliver deep insights without slowing you down. Your mission, should you choose to accept it, is to uncover the “why” behind what people are doing.
Here are a few powerful, low-cost ways to get started:
- Informal User Interviews: Forget needing dozens of interviews. Just chatting with 5-7 people from your target audience can uncover the lion’s share of common frustrations. Keep it casual, ask open-ended questions about their workflows, and just listen.
- Competitor Review Mining: Your competitors’ app store reviews, G2 profiles, and social media mentions are pure gold. Look for the same complaints popping up again and again—those are validated problems just waiting for a better solution.
- Community Lurking: Find the online watering holes where your ideal customers hang out—Slack channels, subreddits, forums. Pay attention to how they describe their problems. This is raw, unfiltered feedback at its best.
The insights you pull from these activities are the raw materials for everything that comes next. This is the heart of continuous product discovery, a habit that keeps your product roadmap tied to actual customer needs. We dive deeper into making this a regular practice in our guide on continuous product discovery.
Translating Research into Actionable Tools
A pile of interview notes is just… a pile of notes. To make it useful, you need to boil it down into simple, visual tools that get your whole team on the same page. Two of the most effective artifacts you can create right now are user personas and journey maps.
A user persona is a quick, fictional sketch of your ideal customer. It’s not their life story; it’s a cheat sheet with their goals, motivations, and the main headaches you’re trying to solve. Give them a name, like “Marketing Manager Maria,” to make them feel real and keep your discussions centred on her, not just on features.
A user journey map is a visual timeline of what someone goes through to get something done. It charts their actions, thoughts, and emotions at every step, shining a spotlight on where things get frustrating (and where you can swoop in to help). It helps you see the entire problem, not just a series of isolated feature requests.
A user journey map is a visualization of the process that a person goes through in order to accomplish a goal. It helps teams understand what it feels like to be a customer.
For example, if you’re building for Southeast Asia, you’d better be thinking mobile-first. The region has about 887 million mobile connections, which is 132% of the total population—crazy, right? A journey map for a user in Malaysia would almost certainly start on a phone. That single insight, as detailed in this ecommerce UX guide from tmogroup.asia, could completely change how you design your product.
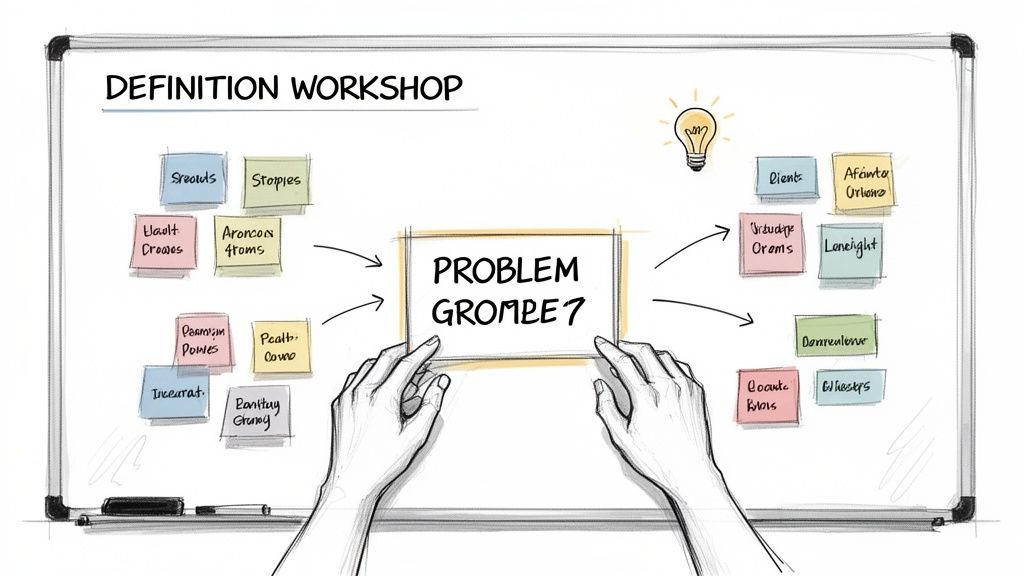
Stage 2: Defining the Right Problem to Solve
Alright, you’ve done the digging. After immersing yourself in your users’ world, you’re probably staring at a mountain of feedback, interview notes, and random observations. This raw data is gold, but right now, it’s just noise. The second stage is all about turning that chaos into clarity by pinpointing the single most important problem to solve.
This is where you switch from gathering everything to focusing on one thing. It’s a deliberate move from a broad understanding of many user issues to a sharp, actionable problem statement. Nail this, and you stop your team from chasing symptoms. Instead, you can direct all your energy toward fixing the real root cause of your users’ frustration.
From Raw Feedback to Clear Themes
First things first, you need to give your research some structure. A fantastic, low-tech way to do this is affinity mapping. Think of it like organising a messy room by putting similar items into boxes. You just write down each piece of feedback or pain point onto a sticky note (digital or physical will do) and start grouping them.
As you cluster the notes, clear themes will start to emerge. You might find a big pile of notes all moaning about “difficulty finding saved reports,” or another cluster centred on “confusing billing information.” These clusters are the recurring patterns in your user feedback, turning a long list of individual complaints into a handful of core problem areas.
A well-defined problem statement is the North Star for your design team. It aligns everyone on a shared mission and provides a clear benchmark to measure potential solutions against.
By laying out the feedback this way, you can instantly see which problems are mentioned most frequently and passionately. This process is crucial for prioritising what to tackle next, ensuring you’re not just fixing minor annoyances but are actually addressing the issues that have the biggest impact on your users.
Framing Problems as Opportunities
Once you’ve identified a core problem, how you frame it makes all the difference. Stating “Users can’t find their saved reports” feels like a dead end. A much better approach is to reframe it using a simple but powerful technique: asking “How Might We” (HMW) questions.
This small linguistic shift turns a problem into a creative challenge. For instance:
- Problem: Users find the dashboard cluttered and confusing.
- HMW: How Might We make the dashboard feel more intuitive for new users?
- HMW: How Might We help users find the one metric they need in under 10 seconds?
These HMW statements open the door for a whole range of solutions without being prescriptive. They’re excellent prompts for brainstorming sessions, encouraging your team to think bigger and explore different ideas.
Kicking Off Ideation with Rapid Sketching
With your “How Might We” questions ready, it’s time to get some ideas on paper. For a small team, you don’t need a week-long offsite workshop. A simple, surprisingly effective exercise is Crazy Eights. Each person on the team grabs a piece of paper, folds it into eight sections, and has just eight minutes to sketch one idea in each rectangle.
The goal isn’t to create a masterpiece. It’s about generating a high volume of diverse concepts, fast. This rapid-fire ideation helps bypass creative blocks and pushes everyone to think beyond the obvious first solution. By the end of this stage, you’ll have a clear, user-validated problem and a whole host of potential solutions to carry into the next phase.
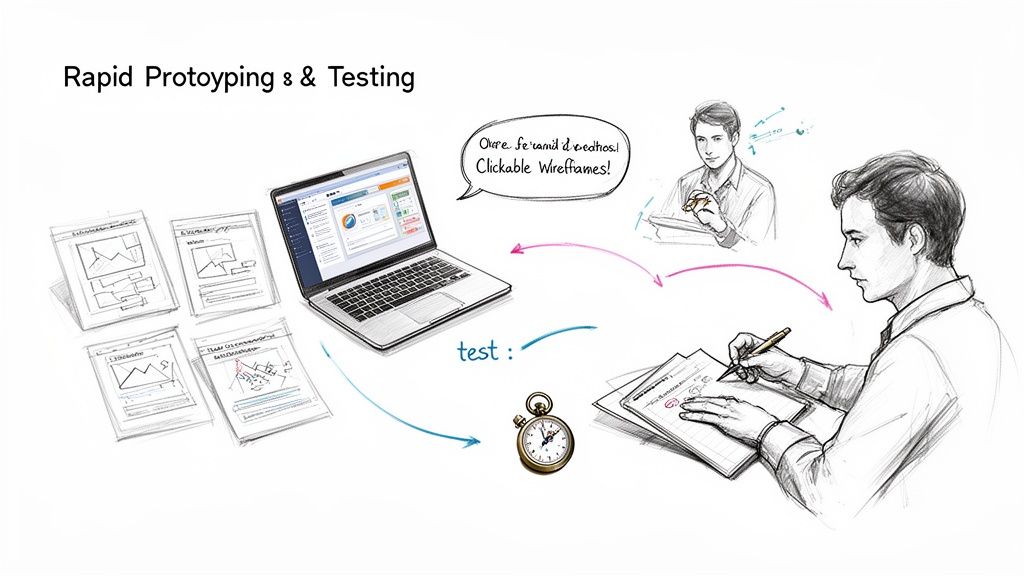
Stage 3: Prototyping and Testing Your Ideas Fast
Alright, you’ve nailed down a crystal-clear problem. Now for the fun part: making your solution real enough to touch. This is where the user experience design process really comes alive.
Prototyping is your chance to build a “pretend” version of your product without writing a single line of code. It’s all about creating a testable artefact that lets you see how real people react to your ideas before you commit to building the real thing.
For a SaaS founder, this stage is your most powerful risk-reduction tool. Instead of sinking weeks or months into building a feature based on a hunch, you can validate (or kill) your concept in a matter of days. The mantra is simple but critical: test before you build. This rapid feedback loop is what separates intuitive software from costly development dead ends.
From Paper Sketches to Clickable Wireframes
“Prototyping” might sound a bit technical, but it doesn’t have to be. The goal is just to create something real enough to get meaningful feedback. You get to choose the level of detail—what we call fidelity—based on what you need to learn.
There are three main levels to think about:
- Low-Fidelity (Lo-Fi): Think pen and paper. These are quick, rough sketches of your interface that focus purely on layout and user flow. They’re perfect for early brainstorming because they’re fast, disposable, and no one gets emotionally attached to them.
- Mid-Fidelity: This is where you jump onto the computer. Using tools like Balsamiq or Whimsical, you create basic wireframes. They’re still black-and-white and don’t include fancy branding, but they clearly show all the UI elements and can be linked together to create a clickable flow.
- High-Fidelity (Hi-Fi): This is as close to the real deal as you can get. Created in tools like Figma or Sketch, these prototypes look and feel like the final product, complete with colours, branding, and interactive bits. They’re best for testing the finer details and the overall vibe.
For bootstrapped teams, starting with lo-fi sketches and moving to mid-fi clickable wireframes is usually the sweet spot. It gives you enough realism for solid testing without the time-suck of a pixel-perfect design. If you’re building an app, a good mobile apps prototype guide for idea validation can be a massive help in getting your concepts tested quickly.
Conducting Lean Usability Tests
Once you’ve got a clickable prototype, it’s time for the moment of truth: usability testing. This just means watching real people try to use your prototype to get something done. It sounds intimidating, but you can uncover major issues with just a handful of users.
Groundbreaking research from the Nielsen Norman Group shows that testing with just five users will typically uncover about 85% of the usability problems in your design.
That means you don’t need a massive budget or a formal lab. You can run incredibly effective tests right from your laptop. The goal isn’t to ask people if they like your design; it’s to watch where they get stuck, confused, or frustrated.
Here’s a simple process for a lean test:
- Define a Goal: What do you want the user to do? Something like, “Sign up for a new account and create their first project.”
- Recruit 3-5 Users: Find people who fit your target persona. A small gift card for their time is always a nice touch.
- Give Them the Task: Share your prototype link and ask them to complete the goal. The magic words are: “Please think aloud as you go.”
- Observe and Take Notes: Now, shut up and watch. Seriously. Note every hesitation, confused expression, or sigh of frustration. Resist the urge to help them!
The insights you’ll get are pure gold. You’ll quickly see which parts of your user flow are a breeze and which are a dead end. This feedback lets you tweak your prototype and re-test, ensuring the version you eventually hand over for development is already validated and easy to use. This cycle is the engine that drives a great user experience, turning your assumptions into certainty.
Stage 4: Launching and Measuring for Continuous Improvement
Here’s a common trap: thinking that shipping a new feature is the finish line. It’s not. It’s actually the starting gun for the next race. The final stage of the user experience design process is all about getting your validated concept out into the wild and then, without missing a beat, shifting your focus to what really matters: measuring its impact.
This is where you turn every launch into a powerful learning opportunity. Instead of just pushing code and hoping for the best, you’ll build a system for tracking what users actually do. It’s this data-driven loop that separates products that stagnate from those that just keep getting better.
Smart Rollouts and Defining Success
For a bootstrapped team, launching a new feature to 100% of your user base at once is a high-stakes gamble. A much savvier move is a phased rollout, which lets you manage risk and gather crucial feedback from a smaller, controlled group before going all-in.
Think about these strategies:
- Internal Testing (Dogfooding): Release it to your own team first. This is a brilliant, low-risk way to catch obvious bugs and glaring usability issues before any customer sees them.
- Beta Group: Invite a select group of your most engaged customers to take it for a spin. Their detailed feedback is absolute gold for that final layer of polish.
- Percentage-Based Rollout: Gradually release the feature to a sliver of your users (say, 5%, then 20%, then 50%) while keeping a close eye on your key metrics.
But before you launch a single line of code, you have to define what “success” actually looks like. Vague goals like “improve engagement” are useless. You need crystal-clear, measurable metrics that tie directly back to the problem you set out to solve in the first place.
Success metrics are the scoreboard for your design decisions. They provide objective evidence of whether your solution is actually working, moving you from subjective opinions to data-backed conclusions.
Pick metrics that reflect real user behaviour and satisfaction. For example, if you just redesigned a reporting feature, you might track the task completion rate or how long it takes a new user to generate their first report. For more ideas, check out our detailed article on how to effectively measure user satisfaction.
Creating a Continuous Feedback Loop
The real magic happens after the launch. This is where you build a powerful, continuous feedback loop that funnels insights straight back into the ‘Discover’ phase for your next great idea. The goal is to make gathering user feedback an automated, effortless part of your process.
This is especially critical in fast-moving markets. For instance, user experience design processes in Southeast Asia have evolved at lightning speed, with companies using deep data analytics to stay ahead. Consumer firms that bake analytics into their digital strategy report a 25-35% jump in customer retention through dynamic personalisation. You can dig into the details of this trend in this comprehensive analysis of the SEA ecommerce market.
This just underscores how valuable post-launch measurement is. But you need the right tools to capture all this great feedback without creating a mountain of manual work for your team.
This is where a platform like HappyPanda becomes your best friend. Instead of juggling a bunch of separate tools, you can create one integrated system that connects your launch announcements directly to feedback collection.
For example, you can use an in-app changelog widget to announce a new feature right where users will see it.
The widget doesn’t just share “What’s New”—it also lets you embed reaction emojis. This creates an instant, zero-friction way for users to share their gut feelings.
Automating the Insights Engine
You can take this even further by automating feedback requests based on what users are doing in your app. Imagine setting up a rule that automatically sends a targeted CSAT (Customer Satisfaction) survey to a user moments after they use your new feature for the very first time.
That kind of contextual, timely feedback is infinitely more valuable than a generic survey blasted out weeks later. This simple automation transforms every feature release from a one-off event into the beginning of a new conversation with your users, ensuring the entire design process kicks off again with fresh, relevant insights.
Building Your Lean UX Toolkit
A solid user experience design process is just theory until you have the right tools to bring it to life. For a bootstrapped SaaS founder, this doesn’t mean splashing out on a dozen expensive, enterprise-level platforms. It’s about building a lean, integrated toolkit where every piece has a clear job, plays nicely with the others, and won’t make your accountant cry.
The real goal here is to create a seamless workflow. Insights from one stage should flow directly into the next, almost like a connected assembly line for product development. Raw user feedback goes in one end, and a validated, user-loved feature comes out the other. This simple setup stops critical insights from getting lost in forgotten spreadsheets or buried in Slack channels.
Your Core Toolkit for Each Stage
To get this whole process up and running, you only need a handful of affordable, powerful tools. The trick is to pick ones that are flexible and built for small teams that need to move fast.
Here’s a simple, effective stack you can assemble today:
- Discovery (Research): Start with simple survey tools like Tally or Typeform for quick user polls. For deeper insights, a tool like HappyPanda can run targeted CSAT or NPS surveys based on user behaviour, giving you feedback right when it matters most.
- Ideation (Collaboration): A digital whiteboard is non-negotiable. Tools like Miro or FigJam are perfect for affinity mapping, journey mapping, and firing up collaborative brainstorming sessions like Crazy Eights.
- Prototyping (Design & Testing): Figma has become the industry standard for good reason. It lets you design, prototype, and gather feedback on clickable wireframes all in one place, which is incredibly efficient for small teams.
This simple combo covers your core needs, letting you move from abstract ideas to testable concepts with minimal fuss.
Connecting the Dots for a Seamless Workflow
The real magic happens when you connect these tools into a cohesive system. For example, insights from an NPS survey in HappyPanda can spark a brainstorming session in FigJam, which then leads to a new prototype in Figma. This creates a repeatable, efficient cycle that keeps you moving forward.
A great toolkit doesn’t just give you features; it reinforces the habits of a strong user experience design process, making it second nature to stay user-centred.
This is especially true in markets that demand constant adaptation. In Southeast Asia, for instance, personalisation has become a huge competitive advantage. A staggering 71% of Gen Z trust online reviews, which has led to 98% executive buy-in for using AI models to sharpen feedback loops.
For founders, this means using tools with AI-powered emails and targeted surveys is no longer a “nice-to-have”—it’s how you stay competitive. You can get more details on these consumer trends from this EDB Singapore report. By operationalising your process with the right tools, you build a system that not only solves today’s problems but also helps you see what’s coming tomorrow.
Got Questions? We’ve Got Answers
Every bootstrapped founder hits a few familiar bumps when trying to get a real user experience process off the ground. Let’s tackle the common questions we hear from teams who are short on time and resources but big on ambition.
How Much Time Does This Really Take?
This is the big one, isn’t it? The fear of a massive, time-sucking project. But here’s the good news: this process is built to be flexible. For a single feature, a lean cycle can be as short as one to two weeks.
Think of it this way: you might spend a couple of days on discovery (chatting with 5-7 users), a day zeroing in on the problem, a few days tinkering with prototypes, and another day or two on testing. The point isn’t to launch a multi-month research expedition; it’s about making smart, quick decisions and moving on.
Do I Need to Hire a Full-Time UX Designer?
Nope, not right away. When you’re starting out, guess who the first UX designer is? You. By using the lightweight methods we’ve walked through, you can build a solid foundation all by yourself.
The most important skill isn’t making things pixel-perfect. It’s the willingness to actually talk to your users, listen to their problems, and test your ideas before you sink weeks into building them.
You can absolutely handle the initial research and rough prototyping. As you grow and the product gets more complex, sure, bringing on a dedicated designer can put the rocket fuel in your tank. But it’s not a ticket to entry.
What if My Users Ask for Conflicting Things?
Welcome to the club! This is not just normal; it’s expected. Think of user feedback as a clue, not a command. When you get requests that pull you in opposite directions, it’s a bright, flashing sign telling you to dig a bit deeper.
This is where you can use techniques like affinity mapping to spot the patterns. You’ll often find that two totally different feature requests are just symptoms of the same root problem. Your job is to be a detective and synthesise the clues, not just build whatever the loudest person in the room asks for.
Ready to build a powerful, continuous feedback loop without all the usual faff? HappyPanda brings feedback, onboarding, changelogs, and email automation together in one simple platform designed for bootstrapped founders. Start your free 14-day trial and turn user-centred design into your secret weapon.